10 rules of bonsai wiring
Among the various techniques employed in bonsai cultivation, wiring stands out as one of the fundamental skills that allows you to craft and refine the unique forms of your trees.
There are 10 rules for wiring a bonsai tree:
- Time your moves
- Choose the right wire type
- Choose the right gauge
- Follow the right order
- Secure firmly
- Maintain the right tension
- Strategize wire positioning
- Bend gradually
- Keep good aesthetics
- Know when to remove
In this blog post, we will explore these essential principles that not only shape our trees but also contribute to their overall health. Whether you’re a seasoned enthusiast or just starting, let’s explore the art and science behind bonsai wiring together.
Time your moves

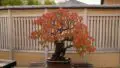
Wired pine bonsai
Best time to wire
While wiring can be done throughout the year, the opportune time to wire a bonsai tree is late winter to early spring for coniferous trees and mid-spring for deciduous trees.
Timing is a crucial factor in the success of bonsai wiring. Choosing the right time of the year to apply this technique can make a significant difference in how effectively the trees can be shaped and how your tree’s health will be affected by the stress of being wired.
Why late winter to early spring for coniferous trees?
From late winter to early spring, the flow of sap is still low as the trees are quasi-dormant, which minimizes the damage from wiring. Also, the damaged tissue will heal quickly once spring comes.
If you try to wire coniferous trees when their new buds and needles start to grow, you risk taking them out or damaging them by accidentally touching them during the wiring process. Unlike deciduous trees, coniferous trees are less likely to produce new growth when new spring buds are removed somehow.
Why mid-spring for deciduous trees?
During spring when the deciduous trees are in their primary growth phase, branches are more flexible and responsive to shaping. The tree sap is flowing and the trees are actively producing new growth, allowing the damage to heal nicely in a short period of time.
The branches and the trunk are also flexible and easier to shape when the tree sap is flowing.
Hard bend
That being said, the best time to do hard bending (bending thick branches or other significant changes in branch direction) is in early spring or around February, regardless of whether the tree is coniferous or deciduous. The procedure can be extremely stressful and is best done when trees are dormant.
When to avoid wiring: during the coldest months
As you can imagine, wiring is very stressful for trees and they are prone to damage if it is done when they are already exposed to other stresses.
So, avoid wiring;
- Immediately after repotting
- Early spring when the buds have just opened
- Heatwave
- Autumn (branches and trunks are thickening quickly)
- Coldest days
- During flower bud formation (varies depending on the species)
- During flowering
Choose the right wire type

Aluminum wire
Choosing the appropriate wire for your bonsai is a critical decision that influences the success of your wiring attempt. The right wire not only provides structural support but also ensures the health and vitality of your tree.
Material: aluminum or copper
The two primary choices for bonsai wire are aluminum and copper.
Aluminum wire
Aluminum wire is lightweight, easily pliable, corrosion-resistant and fairly non-elastic. Also, it is generally less expensive than copper wire. Aluminum wire is especially good for beginners because it can bend and rebend again and again, allowing us to make changes in shaping.
Copper wire
Copper wire, on the other hand, is stronger than aluminum and thus holds the shape well. Although this is a good thing, it is way harder to wrap around branches and trunks and is very difficult to rebend into different shapes once it is bent in one direction without applying a significant amount of force.
If you are considering using another type of wire for bonsai (which I do not recommend), the following is a comprehensive guide to choosing the right wire for your bonsai.
Choose the right gauge
The general rule is to use a wire that is about 1/3 to 1/2 of the diameter of the branch you want to wrap.
The gauge (or thickness) of the wire determines its strength and ability to support the branches effectively. Matching the gauge to the size of the branch is essential for achieving the desired shaping results.

Wrap the second wire.
That said, some branches are harder to bend than others because of species or age. If 1/2 the size of the branch doesn’t have enough strength, you can wrap the second wire in the same position to add more power to bend.
It is always good to have a selection of wire gauges in your toolkit. This allows you to adapt to the diverse sizes of branches within your bonsai. I have wires from 0.7mm to 4mm (0.03 to 0.16 inches) by increments of 5mm (a total of 8 different gauges).
Follow the right order

Start wiring from the bottom.
A good guideline is to start wiring from the bottom and progress upward as well as move from thicker branches to thinner ones.
This systematic method helps establish a solid foundation for your bonsai’s structure and ensures that the primary branches, trunk, and major structural elements are addressed before moving on to the finer details.
Why from the bottom?
In bonsai styling, branches are generally directed down to give an impression of age. If you start from the top, there might not be enough space to bend the branches down. Starting from the bottom helps establish a well-balanced and grounded structure.
Why thicker to thinner ones?
Wiring from thick to thin branches enables you to make sure that major structural elements are in place before refining the smaller branches.
Secure firmly

Secure the wire by sticking it deep into the soil.
To make sure the wire does its job of shaping the tree well, it’s important to anchor it securely so it doesn’t move and keep the desired shape. The beginning part is crucial; if it shifts, things might get wobbly, and your bonsai’s shape won’t stay put.
- When you’re wrapping the trunk with the wire, stick the tip deep into the potting soil to secure it firmly.
- If you’re trying to position the wire between two branches, use the main trunk like a pivot. Wrap the wire once or twice around the trunk and then around both branches to keep it steady.
- If you want to wrap the wire on only one branch, start by wrapping it around the trunk once, then go wrap the branch the way you want.
It is always better to use one long wire instead of connecting short ones together – it’s more effective and stops any wobbling.
Maintain the right tension

Wire with firm tension but not too tight.
Aim for a tension that is firm but not excessively tight. Wrap gently to give a paper-thin gap (literally) between the wire and the branch. This gives some flexibility to accommodate the growth and allow the wire to stay for a while.
In other words, the wire should offer support to the branch without causing too much strain or constriction that might hurt your trees’ growth. Achieving the right level of tension ensures that the wire provides the necessary support for shaping without harming the health of your tree.
Tension in bonsai wiring is a delicate balance that requires experience. You can buy several inexpensive nursery-stock bonsai trees that you feel you can experiment freely and start from there. I recommend buying the same species of trees in pairs because it allows you to observe in time the differences in response to wiring.
Strategize wire positioning

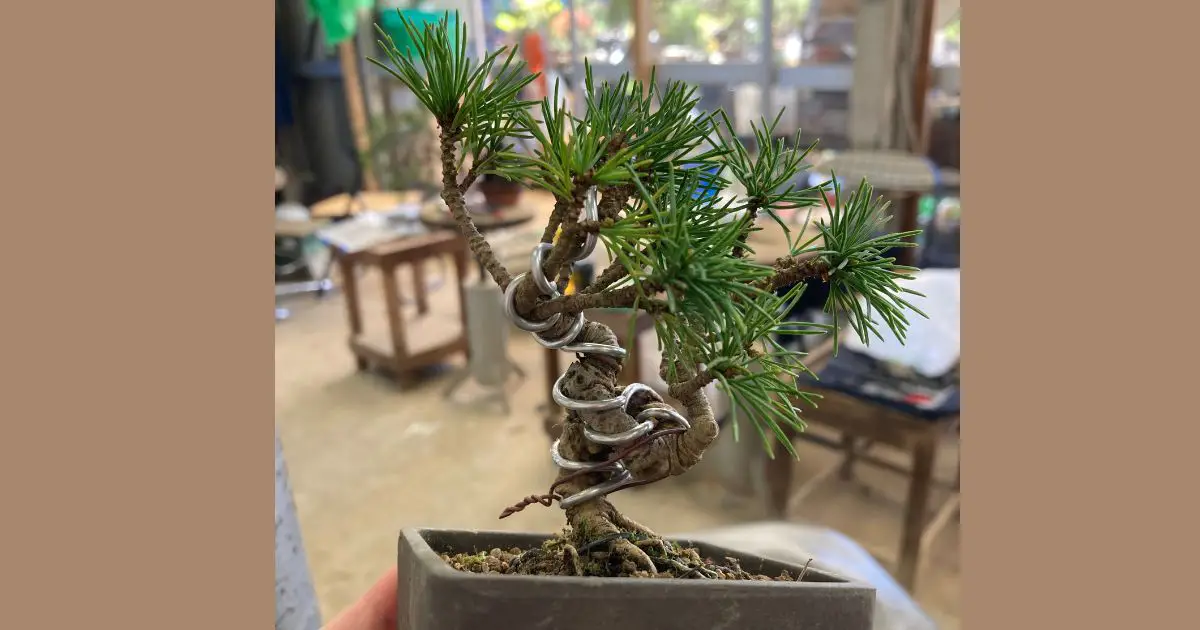
Wrapped at a 45-degree angle
Wrap the wire at around 45-degree angle.
Why a 45-degree angle?
The 45-degree angle provides effective support for shaping the branch and allows the wire to grip the branch firmly without causing excessive pressure or damage.
This angle is a good balance between holding the branch securely while allowing for some flexibility at the same time. At a narrower angle, there’s more than wire needed for shaping. At a wider angle, the power of the wire is not strong enough for shaping.
The right angle ensures maximum effectiveness with minimal damage to bonsai trees.
Where exactly to wire?
The wire also serves as a safeguard from snapping. So, when you’re wiring, make sure to wrap it right where you want the branch to bend.
Placing the wire on the inside of the bent puts stress on the outer branches where tension is highest, increasing the risk of them breaking. It happens more than you think if you wrap the wire in the wrong place and try to bend it.
So, be smart about where you place the wire with the right angle.
Bend gradually
When shaping branches with wire, gently bend the wire (not the branch) while twisting the branch a bit in the direction the wire was applied; twist the wire clockwise when it is wrapped clockwise and anticlockwise when wrapped anticlockwise.
This helps the wire stick to the branch firmly, making the bending more effective in shaping.
Do not twist too hard unless you want to. It can cause the wire to bite in severely, leading to growth issues and branch withering. Some trees are more prone to breakage, so it’s essential to consider the post-bending growth and how much force you want to apply to the tree.
While bending, make sure to bend the point where the wire is wrapped. You cannot bend the branch in between wrapped wires without risking breaking. If the branch is rigid, bend it gently several times in the desired direction before wiring to make it more pliable.
Keep good aesthetics
Creating a visually appealing bonsai is important and to ensure the harmonious integration of wire into your tree’s design, pay close attention to wire color and positioning.
Color: brown or black
Wires in shades of brown or black are the best choice for bonsai. Wires rest on bonsai trees for at least several months. Brown and black colors tend to blend well with the natural colors of tree bark, making the wire less noticeable and allowing the focus to remain on the tree’s form.

Silver wire looks very obvious and does not blend in with the tree.
The key is to choose a wire color that complements the overall aesthetics of your bonsai. Brown or black wire is versatile and tends to work well with various tree species.
Positioning: even spacing
Avoid wrapping wires spaced unevenly or too closely together, or wires crossing other wires. This will not only look bad but also ineffective in terms of shaping.
Know when to remove

Wires started to bite after several months.
Knowing when to remove the wire ensures that your bonsai trees not only maintain their form but also thrive in health and vigor. Wires, if left on for too long, can leave scars on the branches as the tree grows. Timely removal minimizes the risk of these scars, preserving the natural beauty of the branches.
Inspect wired trees regularly and observe how the tree is responding to the shaping, especially during the growing season. In my experience, once a week isn’t enough. Young and vigorous trees can grow really fast and the wires bite in branches before you notice.
Once the branches have set in their new form or the wire starts to bite, remove the wire to avoid any adverse effects on continued growth. It might take a couple of months to more than a year depending on species (coniferous trees grow slower), the age of the trees (younger trees grow faster) as well as the climate where they are placed (warmer climate with lots of sunshine promotes faster growth).