- Introduction to Structural Pruning
- Tools and Preparation
- Zelkova bonsai pruning: A step-by-step guide
- Step 1: Collect tools
- Step 2: Envision the desired style
- Step 3: Determine the height
- Step 4: Choose the front
- Step 5: Choose the main branches
- Step 6: Remove excessive growth
- Step 7: Prune the leader if necessary
- Step 8: Remove unwanted branches
- Step 9: Thin out crowded areas
- Step 10: Prune for ramification
- Step 11: Balancing and adjusting
- Step 12: Wiring (if needed)
Introduction to Structural Pruning
Structural pruning
Among the various techniques involved in bonsai care, structural pruning stands out as a fundamental skill. Structural pruning is one of the two bonsai pruning techniques that involves removing larger parts of the tree to modify the tree into a desired shape.
In other words, it is the art of shaping a bonsai tree to achieve a specific form and structure that you want to create with the tree.
Structural pruning is the cornerstone of bonsai cultivation, and it plays a pivotal role in bringing out the inherent beauty of your tree into realization.
Season and timing
Timing
Timing is a crucial factor when it comes to structural pruning for your Zelkova bonsai. Dormant season is always good for this type of drastic operation but it is best done in the very beginning or the end of winter.
In the coldest months of winter, the risk of frost damage to freshly pruned branches is higher. Pruning during this time can lead to freezing and damage to newly exposed wounds.
The timing can vary depending on your location; it can be late fall or early spring.
Benefits of winter pruning
This period has several advantages for structural pruning.
Clear view of the structure
The tree’s branches and structure are fully visible after the leaves have fallen. This provides a clear view of the tree’s form, making it easier to assess and prune effectively.
Reduced stress
During dormancy, your zelkova bonsai is less active and experiences almost no growth. This minimizes the stress on the tree when you make large cuts, allowing it to recover more efficiently when spring comes.
Assessing dormancy

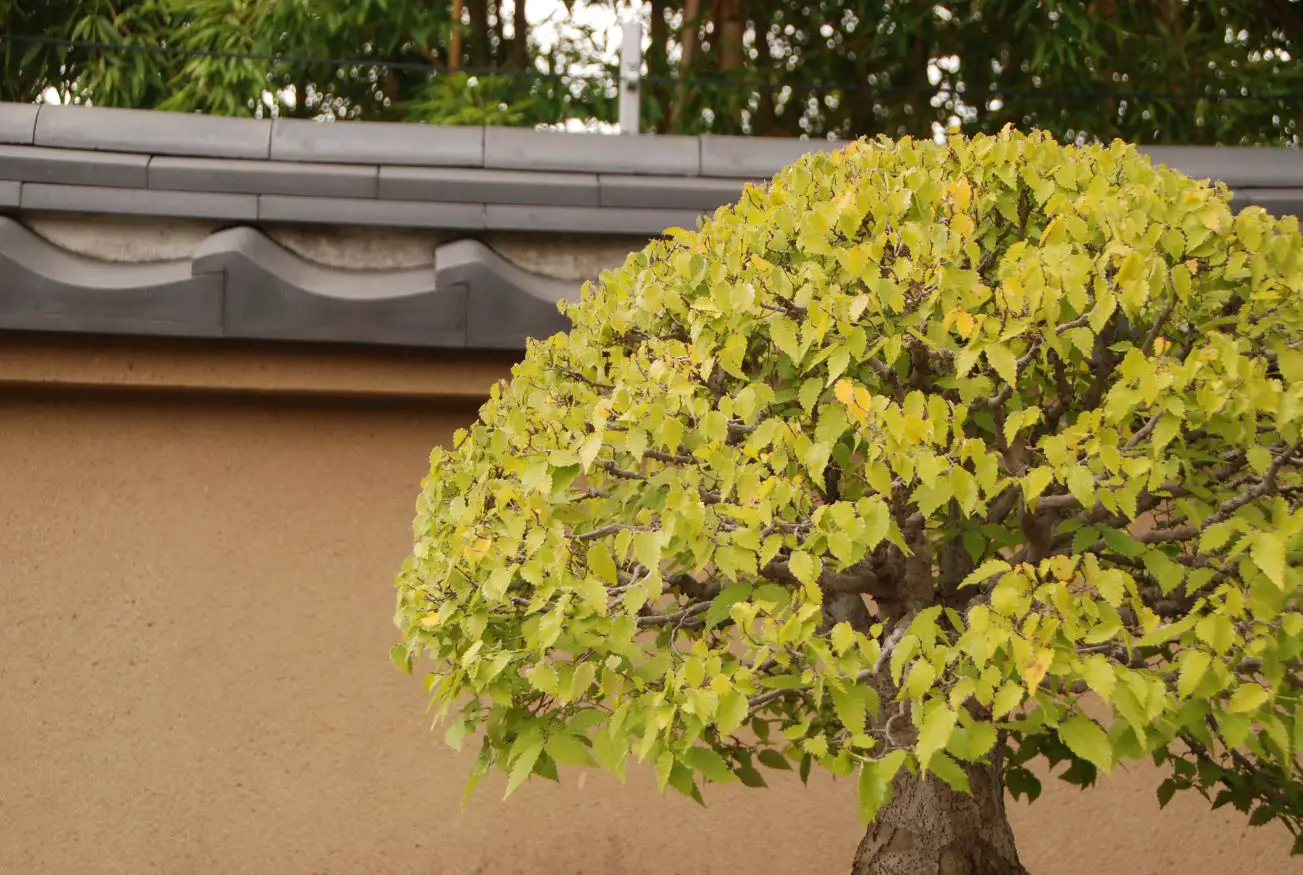
If the leaves on your zelkova bonsai look like this, you can proceed with structural pruning.
To determine if your zelkova bonsai is in dormancy, observe the tree for signs such as:
- Leaf color changing from yellow/orange to brown,
- Slower response to watering.
If your tree still has brown leaves, take all of them before starting structural pruning.
Creating the broom style

Broom style (winter)
The broom style is a classic zelkova bonsai style characterized by a straight, upright trunk with branches radiating in all directions like the bristles of a broom. Although this style reflects its natural growth pattern, you need specific pruning techniques to achieve it on your zelkova bonsai.
The characteristics of the broom style include-
- Straight, upright trunk
- Branches radiating in all directions
- Branches growing upward
- Very finely ramified branches
- Round canopy
Understanding taper
Taper is an essential element of bonsai aesthetics because it mimics the growth pattern of mature trees found in nature. In the broom style, branches and the trunk should theoretically be thicker closer to the trunk’s base and gradually become thinner toward their ends. This creates a sense of proportion and balance in your bonsai.
Tools and Preparation
Before jumping into pruning your Zelkova bonsai, it’s essential to gather the right tools and prepare your workspace. Proper tools and preparation ensure a smooth and effective pruning that gives the best results for your effort.
Tools for structural pruning
Tools you need for structural pruning are:
- Bonsai pruning shears/ scissors,
- Wound sealant,
- Turntable (optional), and
- Wire (optional).
Bonsai pruning shears or scissors

Bonsai scissors
Prepare bonsai pruning scissors. You cannot do this drastic yet delicate procedure with ordinary garden pruners.
Bonsai scissors are designed especially for bonsai work to do clean and precise cuts and will leave minimal scars on your tree. Ordinary pruners like bypass pruners are not for fine pruning like this and have a higher risk of pruning wrong branches.
Bonsai wound sealant
For structural pruning that makes major cuts, bonsai wound sealant is a must.
Bonsai wound sealant, also known as “cut paste,” is a specialized product that helps in the healing and protection of tree wounds and pruning cuts. It helps protect the cuts you make from diseases and pests. Also, the wounds will heal nicely without visible scars compared to letting them heal naturally.
Turntable (optional)
Using a turntable or a rotating stand can be a very useful tool. It allows you to rotate your bonsai tree without difficulty, providing easy access to all sides of the tree without the need to physically reposition it. This is particularly helpful for pruning and shaping the entire tree like structural pruning.
Bonsai wire (optional)
Wiring can be handy for positioning branches during and after pruning. It’s especially useful when fine-tuning the broom style to correct the branches straight or growing upward.
Preparing for structural pruning
Sanitize your tools
Make sure that your pruning shears or scissors are clean and sharp. Dirty or dull tools can lead to jagged cuts and harm your tree by leaving permanent scars or inviting diseases.
Prepare a workstation
Find a comfortable workspace for your pruning session. Depending on the size of your tree, it may take quite a while. A table and a chair at a comfortable height can make the process more enjoyable.
Zelkova bonsai pruning: A step-by-step guide
Structural pruning is a fundamental technique in bonsai care, especially when aiming to achieve a specific style like the broom style. Follow these steps to perform structural pruning on your Zelkova bonsai.
Step 1: Collect tools

Bonsai trimming scissors (long shank)
Collect the necessary tools, including bonsai pruning shears or scissors, bonsai wound sealant, turntable (optional) and bonsai wire (optional). Make sure your tools are clean and sharp.
Structural pruning is best done during the dormant season, typically in early or the end of winter. Check if your tree is in a dormant state before proceeding, especially if you are planning to do it in early winter. If it is too early in winter, your tree may try to revive by growing new shoots, which will die when the cold sets in.
Step 2: Envision the desired style

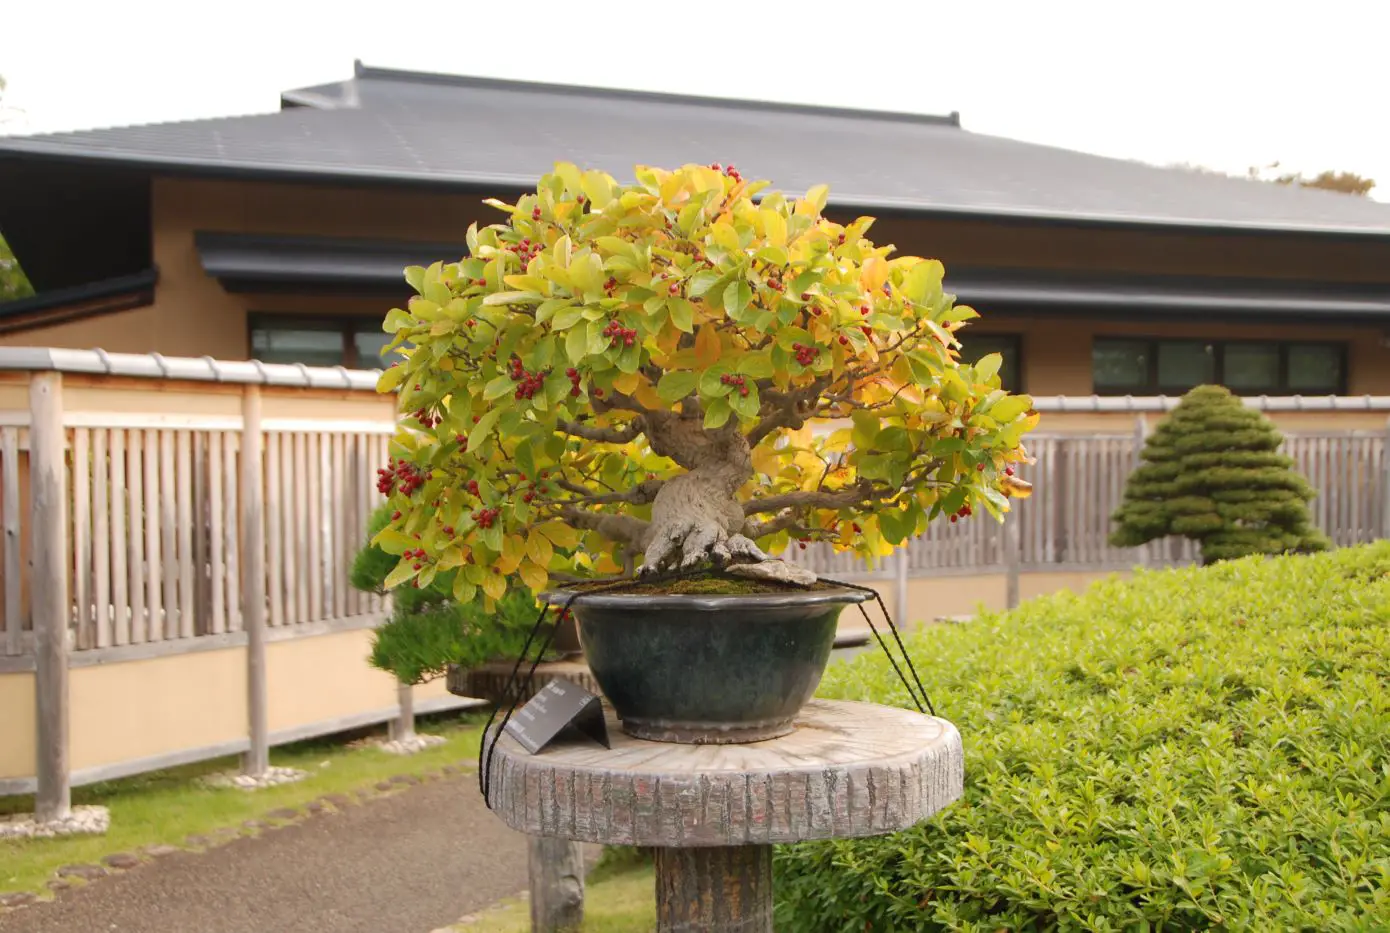
Broom style (summer)
Before you begin pruning, it is crucial to have a clear image of your tree’s final structure.
Familialize yourself with the style you want to make by looking at the pictures online or going to the bonsai gardens and watching zelkova bonsai trees in person. This will help you visualize the design and style you want to achieve with your Zelkova bonsai.
Then, examine your Zelkova bonsai closely. Take note of its current shape in your mind and think about how you can achieve the desired final structure by removing branches problematic branches or encouraging new shoots to emerge.
Having a clear plan in mind is very important. Whether you’re aiming for the broom style or another form, having a clear mental image will guide your pruning process.
Step 3: Determine the height
Determine how high you want your zelkova bonsai will be. It is a creative decision that depends on your artistic vision and the specific style you want to achieve. The height should align with the style you intend to create.
It also depends on how long you want to work with your tree before it’s finally styled. If you want your tree to be a big bonsai, it may take a long time. If it can be a mini bonsai, it only takes several years.
Step 4: Choose the front

The “front” of a Japanese black pine bonsai
Choose the “front” of your bonsai tree, which is the side that looks most aesthetically pleasing from the viewing angle. Consider both visual appeal and visual interest when selecting the front of a bonsai tree.
This is an important step because the chosen front will be the primary perspective from which your bonsai is viewed, and it influences the overall aesthetics of the tree.
It may be difficult to see which is the best side of your tree. Please check the link below. There is an article that might be helpful to you in choosing the front.
Step 5: Choose the main branches

Main branches
Now that you’ve determined the front, identify the main branches that will form the structural framework of your desired style. These branches will be the foundation for the desired style, whether it’s the broom style or another form.
In selecting the main branches, choosing the primary branch that is growing at the lower part of the trunk is the most crucial part of determining the bonsai tree shape. The lowest part of the branch serves as the foundation for the entire branch structure.
If you are trying to shape your tree into broom style, the primary branch should be at 1/3 to 1/2 of the height of the tree from the base of the trunk when the bonsai shaping is complete. Then choose the secondary and tertiary branches.
There should be enough space under the primary branch, but not too much. Remember that it is very difficult to grow another branch in the lower part of the trunk below the primary branch unless your tree is very young and vigorous.
Step 6: Remove excessive growth
Before getting into the real part of pruning, remove branches that have grown excessively long or too vigorously. Trim back any branches that are outside the final shape of the tree.
These branches are almost always unnecessary. You want to leave them only when you want that branch/trunk to thicken fast.
Step 7: Prune the leader if necessary
Trim the leader (i.e. the top of the trunk) to achieve the desired height for the style if necessary. Depending on how far along your styling is, you may need to trim the leader to achieve the appropriate height taking into account the yearly growth.
Step 8: Remove unwanted branches
Remove the branches that do not contribute to the style you want with your tree. These include:
- Branches growing downward
- Ramified branches that grow straight up
- Branches crossing over others
- Branches growing towards the front of the tree
- Small, weak shoots that do not fit into the overall design
- Branches that are too vigorous
- Branches that are about the same size or thicker than the trunk
- Dead branches
When you make cuts, make sure that you cut just above a leaf node or bud to encourage new growth in the direction you desire.
Periodically step back and assess your zelkova bonsai from the front and different angles as you prune. This will help you ensure that you’re achieving the desired shape and balance. Make adjustments as needed to refine the initial structure.
As you prune branches, pay attention to maintaining the taper of the tree. In bonsai, branches should be thicker closer to the trunk and gradually become thinner toward the tips. Trim branches accordingly to preserve this natural and aesthetically pleasing taper.
Step 9: Thin out crowded areas
Thin out those areas overcrowded with branches and foliage by selectively removing branches to create space and allow light and air to reach the interior of the tree. This will help prevent pests and diseases as well as promote the development of new shoots from the inner part of the tree.
Step 10: Prune for ramification
Cut back the branches leaving 2 to 3 nodes to increase fine ramification. Japanese zelkova trees have strong apical dominance and tend to grow strongly upwards. Trimming only the very tips of the branches will not likely make another branch but only elongate the same branch from the cut.
By cutting back the branch hard, new branching closer to the main trunk is expected to be stimulated.
Step 11: Balancing and adjusting
Again, step back from time to time to assess your zelkova bonsai from the front and different angles as you prune. This will help you identify any areas that require further adjustments.
Make sure that the main branches are evenly spaced around the trunk, creating a radial pattern. Branches of zelkova bonsai should be directed upwards unlike common bonsai styles.
Be patient and take your time to achieve the desired aesthetics.
Step 12: Wiring (if needed)
While structural pruning forms the core of shaping your Zelkova bonsai into the broom style, optional wiring techniques can be a valuable tool for achieving precise branch positioning and enhancing the overall aesthetics of your bonsai.
If you are aiming for broom style, you can wire the trunk or branches that tend to grow in zigzag shape to straighten up.
Select the appropriate wire gauge for your zelkova bonsai. The wire should be strong enough to hold branches in place but not so thick that may damage the bark. Aluminum wire is much easier to handle than copper wire.
Here’s a step-by-step guide to wiring branches.
- Begin by anchoring one end of the wire securely to the soil, trunk or a branch growing near the one you want to bend.
- Carefully wind the wire along the branch you want to shape. Make sure it is tight enough but not overly tight. Maintain an even spacing between coils.
- Shape the branch by gently bending the wire (not the branch) to the desired position. Be careful in handling the bent. The branches are more likely to break during the dormant season because tree sap doesn’t flow much.
- Take the wire off in the next spring.
For a comprehensive guide on zelkova bonsai care, please check the article below.