Introduction to Juniper Bonsai Tree Propagation
Methods of Propagating Juniper Bonsai
There are 3 methods of successfully propagating juniper bonsai trees, including:
- propagating from cuttings,
- air layering and
- propagating from seed.
Each method has its own benefits and drawbacks but the easiest for juniper bonsai propagation is from cuttings, while propagation from seeds is the hardest. Let me explain to you in detail.
From Cuttings
Cutting propagation for juniper bonsai is a method of propagating them by taking a piece of new shoots from a healthy and established parent tree, encouraging it to develop roots, and then training it into a bonsai tree.
Cutting propagation is reliable and the easiest method for juniper bonsai because cuttings have the highest success rate in terms of root development compared to other methods. Juniper cuttings are known to root relatively easily and can quickly establish themselves as new trees.
If you choose the parent tree with desirable traits, you can have them in the new trees as well.
Air layering

Bonsai air layering
Air layering for juniper bonsai involves creating a wound on a healthy and established branch or trunk, then wrapping the wound with a rooting medium and enclosing it in a protective covering.
Air layering juniper trees is considered moderately challenging but can yield successful results with the right technique and care.
From seed

Propagating juniper bonsai trees from seed is a method that requires a lot of patience because it is time-consuming. Juniper seeds have a hard outer coating that needs to be stratified to improve germination rates, which would take at least several weeks.
After that, the germination occurs in several months to sometimes even over a year. Junipers grow slowly and it would take at least several years for the seedlings to mature and develop into bonsai-worthy specimens.
Though propagating juniper bonsai from seed is totally doable, I think it’s only worth doing when you want to try this method for an experiment. If you want to propagate juniper bonsai trees in a reasonable time frame, this is not the way.
What about grafting?
Grafting is a process of propagating bonsai trees by joining a cutting from a desired tree onto a rootstock from a different tree. The two parts are then bound together until they fuse and form a single tree.
While grafting juniper bonsai trees is doable and has been done in the past, I do not think grafting is a viable propagation method for juniper bonsai mainly due to their low success rate. It is much easier to propagate juniper bonsai from cuttings or air layering than grafting.
Tanuki bonsai

Tanuki bonsai
There is a bonsai called a Tanuki bonsai. It is a bonsai made by grafting, the technique often used when making a Shimpaku juniper bonsai. But this is not normal grafting because it involves attaching a living tree to a piece of deadwood, not a living tree, to create a new bonsai tree.
Tanuki bonsai is not a standard propagation technique and needs advanced skills for making a good tree using this method.
For more about Tanuki bonsai, the following post covers all you need to know.
Recommendation for juniper propagation
As I said earlier, the easiest way to propagate juniper bonsai is from cuttings. Junipers can root relatively easily and the new trees mature faster than those grown from seeds. Cutting propagation is also good to have mini trees in large numbers. It is practical and the most efficient method.
If you’re looking to obtain an established bonsai tree in a relatively short period of time, air layering would be the best method to consider. Air layering allows you to create new bonsai trees by taking only desirable parts from an existing tree. So, you may be able to create a fully-grown bonsai tree within a couple of years.
Suitable Juniper Species for Propagation
Many juniper species are suitable for bonsai propagation while some are easier to propagate than others. The following four juniper species are most commonly used for bonsai and all of these can be propagated successfully.
-
- Chinese juniper (Shimpaku juniper),
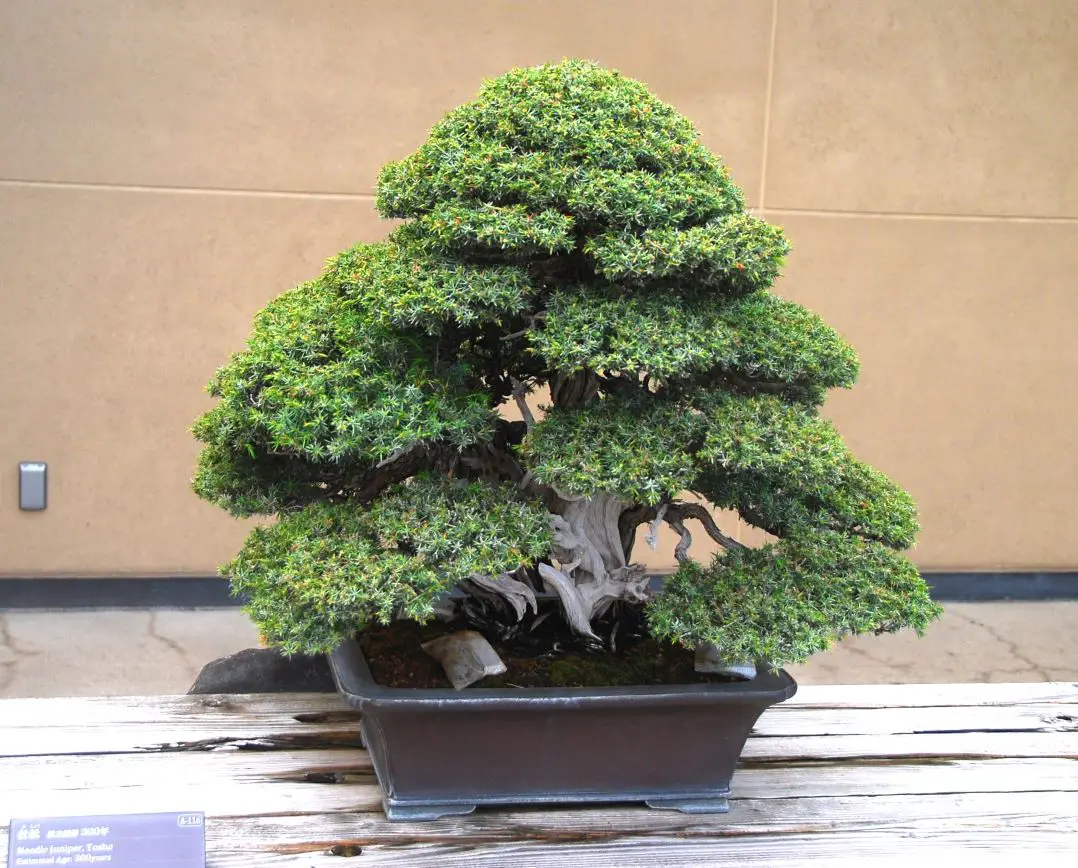
- Chinese juniper (needle juniper),
- Common juniper, and
- Rocky Mountain juniper.
Chinese Juniper

Needle juniper
Chinese juniper is native to China, Japan, and Korea and 2 variations are popular choices for bonsai: Shimpaku juniper (Juniperus chinensis var. sargentii) and needle juniper (Juniperus rigida). These can be propagated from cuttings, air layering, and seed.
Common Juniper (Juniperus communis)
Common juniper is native to northern regions of Europe, Asia, and North America. Common Juniper is an excellent choice for bonsai and can be propagated easily from cuttings, air layering and seed.
Rocky Mountain Juniper (Juniperus scopulorum)
Rocky Mountain juniper is native to the western United States and can be propagated from cuttings or seeds.
If you want to dig deeper into the characteristics of the best juniper species to grow and propagate, the following post would help you do it.
How to propagate juniper bonsai from cuttings
Timing
The best time of the year to propagate juniper bonsai from cuttings is in the spring. During this period, juniper trees are actively growing and have higher levels of energy and hormonal activity, making them easier for root development.
You can take cuttings for propagation or use the branches you cut off when pruning your tree.
Tools you need
To propagate juniper bonsai from cuttings, you need;
-
- clean, sharp pruning shears,
- rooting medium (small grain Akadama, Kanuma, perlite, volcanic rock),
- container with drainage holes, and
- plant hormone (optional).
Growing medium
Recommended soil mix for rooting is;
-Akadama (small size): 70%
-Volcanic/river sand: 30%
(Link to Amazon)
The growing medium should have good drainage as well as water retention.
If Akadama is not available, you can use volcanic/river sand as the main potting medium with 10% peat moss for moisture retention. Perlite is also OK but you need to make sure that cuttings are not disturbed by wind or rain because perlite is super light.
A step-by-step guide to rooting juniper cuttings
Step 1: Prepare rooting medium
The first step before doing anything is to prepare the rooting medium. Mix the soil and put it in the container. You may put pumice at the bottom for drainage. Water it thoroughly.
The container can be anything from a clay pot to a box but it should have drainage holes at the bottom.
Step 2: Gather cuttings

Juniper cuttings
The next step is to gather materials. The best season to do this is in spring as I said earlier but it can be done any time of the year except for the hottest and coldest seasons. Select healthy, vigorous shoots from young branches that are a couple of years old and not beyond 5 years old.
Cuttings of 2 to 4 inches (5 to 10 cm) long have the best chance for rooting but they can be just a small portion of the shoots. Make sure to leave some brown portion of the branch. New shoots with only green needles are difficult to root and even if they do, they are too weak to grow.
Step 3: Prepare cuttings
Using the pruning shears or a knife, cut the base of the cutting at a 45-degree angle. You can make two cuts at a 45-degree angle from two sides to increase the surface area for rooting. Put them in water to avoid dehydration.
Step 4: Put rooting hormone (optional)
Dip the base of the cutting into the rooting hormone, following the instructions on the package. Juniper cuttings are relatively easy to root but this optional step helps to increase the rate of rooting.
Step 5: Plant the cuttings
Make a small hole in the soil and plant the cutting straight up an inch deep (3cm) into the rooting medium, 2.5 inches (6cm) apart from each other so that all of them can have sunlight and water. If the cuttings seem to be wobbly, you can put as much as half of the cuttings in the soil.
Step 5: Place the container
Place the container in half shade without direct sunlight and wind for at least 2 weeks. Water the growing medium and mist the cuttings at least once a day. Cuttings cannot absorb water before they take root and misting will prevent them from dehydration.
They should take root in a month or two if you propagate in spring. You can tell when the needles get greener and start growing again. Never try to pull them out of the soil to see if they took root because you may severely damage the new roots that are still very fragile.
How to propagate juniper bonsai from air layering
Timing
The best time to propagate juniper bonsai through air layering is in the spring. During this period, the Juniper tree is in its active growth phase, which enhances the success rate of air layering. When the temperature is below 50°F (10°C), there might not be any root growth.
Tools you need
To propagate juniper bonsai from air layering, you need;
-
- clean, sharp pruning shears or a knife,
- sphagnum moss,
- plastic bag,
- twine/string, and
- plant hormone (optional).
A step-by-step guide to air layer juniper bonsai
Step 1: Determine the Air Layering Location
Choose a healthy, mature branch of a portion of the trunk from the juniper tree that you want to propagate. Ideally, a branch that is a couple of years old has a higher success rate but an old branch/trunk can develop new roots as well.
Identify a suitable location on the branch where you will make the air layer. A branch or trunk with fine ramification and good foliage is desirable.
Step 2: Make a Ring Cut

Juniper air layering
Using a sharp, sterile knife or pruning shears, make a ring cut around the branch or trunk. The ring cut should be about 1 inch wide and should penetrate through the bark and into the pale-colored cambium layer, but avoid cutting into the hardwood (which is creamy white).
Remove all the unnecessary layers away, leaving only hardwood. If the cambium layer is not properly removed, it may inhibit the development of new roots, resulting in limited or no root growth from the air layer (the wound can heal itself without rooting).
Step 3: Apply Rooting Hormone (Optional)
You can apply a rooting hormone to enhance root development. Follow the instructions on the rooting hormone product for proper application.
Step 4: Wrap the Area with moss
Take a piece of clean sphagnum moss, put it in water and wrap it around the exposed wound. The layer should be about 1 to 2 inches (2.5 to 5 centimeters) thick. This thickness provides sufficient moisture retention and insulation while allowing for proper air circulation for new roots.
Make sure the moss covers the entire cut area.
Step 6: Secure the Wrap
Use plastic wrap or a bag to hold the moss. Then use twine or string to secure the moss and plastic wrap in place. Make sure it is tight enough to maintain adequate moisture but not too tight to restrict growth.
Step 7: Monitor and Water
Check regularly the air layer to make sure the moss remains moist throughout the propagation process. If necessary, add water to keep the moss wet.
For successful air layering, you need to use sterile tools and materials so that no fungi or pests emerge in the wrap.
Over time, roots will start to develop within the moss layer. This process can take several weeks to a couple of months, depending on the species and conditions. Monitor the air layer for signs of root growth.
Step 8: Separation
When you see multiple roots coming out of the moss, a sufficient number of roots have developed for separation. The roots should be forming from the upper part of the wound.
Carefully cut below the air layer, just below the newly formed roots using sharp and sterile scissors or a knife. Remove the air layer from the parent branch/trunk.
If you live in an area where the temperature gets below freezing in winter, you cannot leave the air layer attached to the tree because moss would not provide much insulation for the new roots. If the roots are not developed enough, you need to put your tree in a greenhouse or some kind of protection facility.
Step 9: Planting
Plant the rooted air layer in a suitable pot. Avoid strong sunlight and wind until roots are firmly settled in the soil.