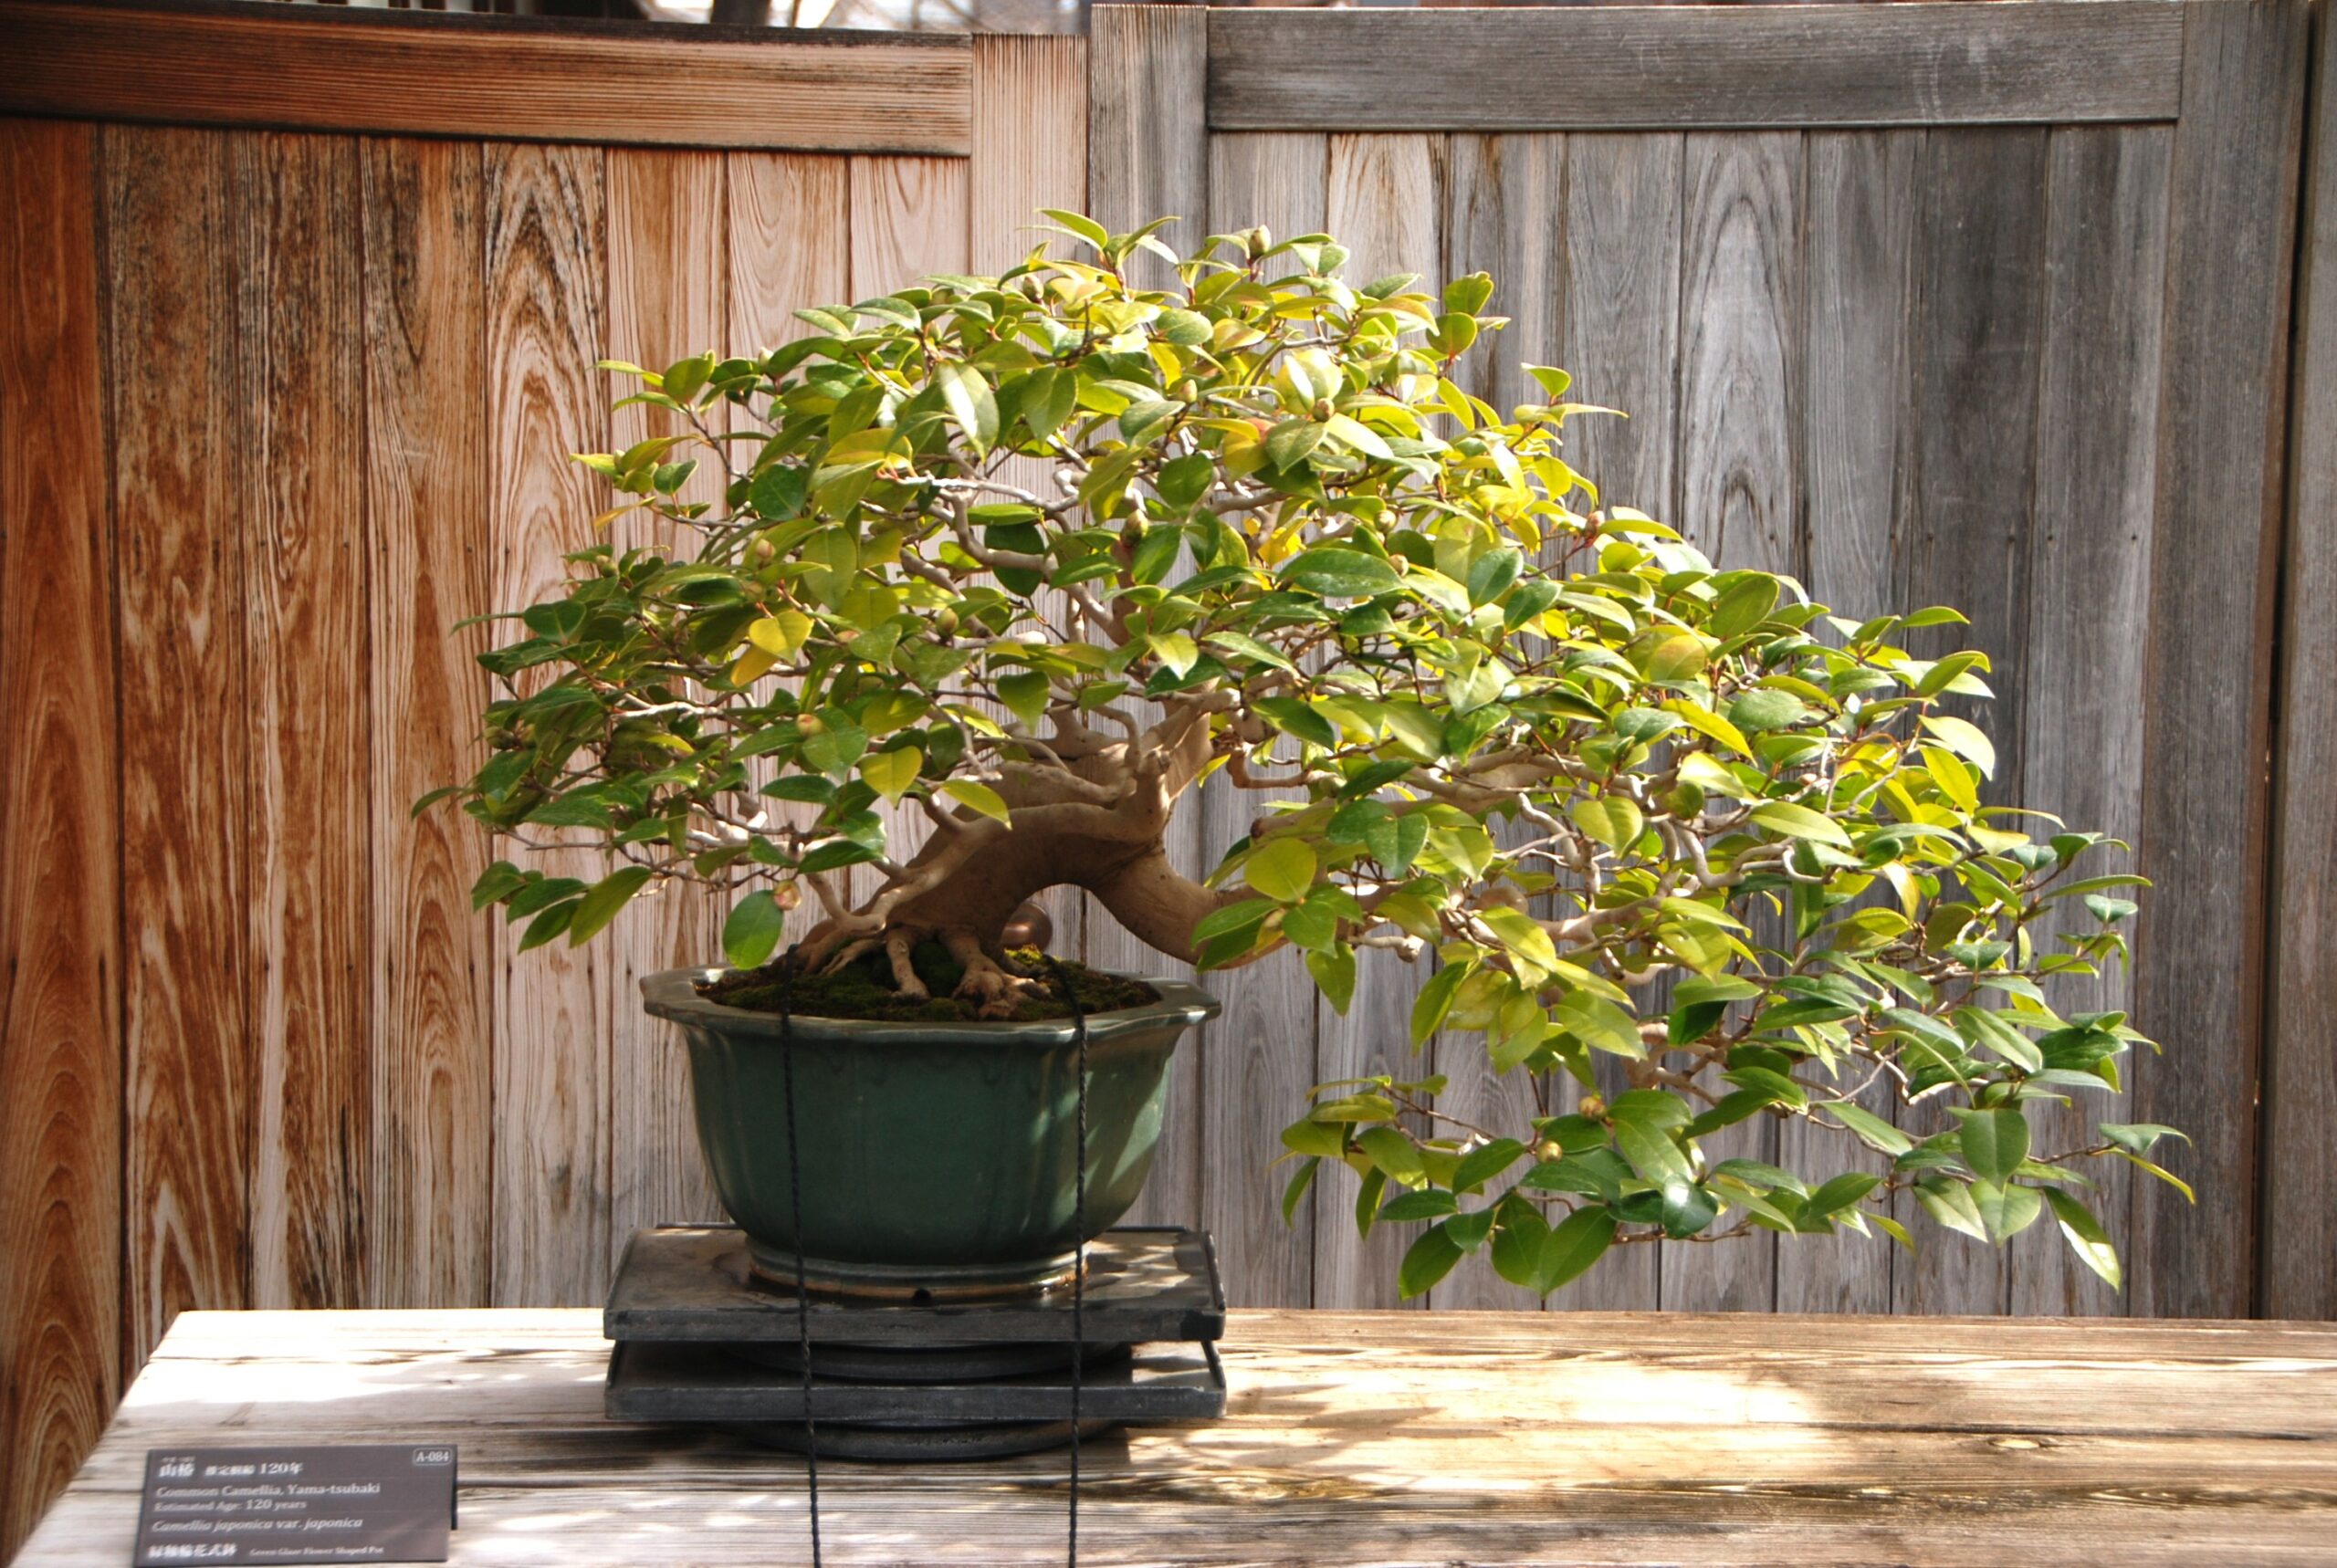
Before you start repotting bonsai
Why repotting is important for bonsai trees
Bonsai trees are a beautiful and unique addition to any home or garden. It may seem to be difficult to care for them but it is not. With a little guidance, even beginners can successfully maintain their health and help them flourish.
One of the essential tasks you should know in caring for your bonsai tree is repotting; it is crucial to repot your bonsai tree periodically to maintain its health and longevity.
Repotting bonsai trees has 2 major objectives:
- refresh soil and
- provide extra room for roots.
Refresh soil
Maybe it is new to you but every soil has a certain lifespan after which time it does not work as we expect it to. Over time, soil particles will break down, the soil will be depleted of nutrients, and/or the pH of the soil may change.
Soil degradation
Soils commonly used in bonsai cultivation can last for a couple to several years, and the exact duration depends on several factors such as tree age, soil type, and environmental factors. When the soil is degraded, it cannot drain water well which causes root rots, and it cannot hold onto nutrients that we give as fertilizers.
For more information on this topic, the following post might be helpful.
Nutrients depletion
The nutrients that you mix as basic food in the form of organic matter for your bonsai trees decompose and are used up by trees over time. When it comes to that, your bonsai trees are completely dependent on you giving them as fertilizers for all the nutrients they need.
Change of soil pH
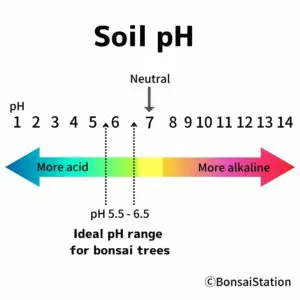
Soil pH & bonsai tree
Bonsai trees grow well in slightly acidic soil (pH between 5.5 to 6.5) but tap water in the US tends to have higher alkalinity than it should for irrigating bonsai trees. If you are using tap water for irrigation, soil pH may change over time which negatively influences the nutrient uptake of your trees.
For more about this topic, please read the following post.
Provide extra room for roots
Roots grow vigorously when trees are young and healthy but when pots are filled with roots, water does not drain well as the roots cover the drainage holes. Roots cannot respirate enough and they may die gradually.
This is why we need to repot bonsai trees regularly to provide extra room for roots to grow.
What happens if you don’t repot bonsai?
If you neglect to repot your bonsai tree, its health and growth can be severely impacted. This can lead to yellowing leaves, stunted growth, and even death.
Over time, the soil in the bonsai pot will be compacted, depleted of nutrients, and may even change soil pH. When this happens, the soil cannot drain water well and the root system is stuck with soil that may be toxic or without their food.
Timing: Best time and frequency
When is the best time to repot?

Early spring is the repotting season because it causes the least damage to the bonsai trees. When the trees wake up from the dormant state, they can recover quickly from the stress of repotting and root pruning.
It is important to note that repotting in summer is stressful for the bonsai trees and can even cause them to die. Root growth tends to slow down during the hot months when soil temperatures are higher and moisture levels may be lower.
You may also be able to repot your bonsai trees in fall in the warm region but it is better not to do so, particularly in colder climates.
How often do bonsai need to be repotted?
Bonsai trees should be repotted every 1 to 4 years depending on their species and age. Generally speaking, coniferous trees need less repotting than deciduous/flower/fruit trees because they tend to grow slower.
- Deciduous/ flower/fruit trees: every 1-2 years
- Coniferous trees: every 3-4 years
As to age, younger bonsai trees, which are developing their trunk, branches, foliage, and root systems, need to be repotted more frequently than older trees.
Potting mix: Which soil to use
How to choose the right soil
Choosing the right soil for your bonsai tree is essential for its growth and overall health. Bonsai trees have unique soil requirements, which differ from traditional houseplants or outdoor plants.
Good bonsai soil must meet the following requirements.
- Good water retention,
- Good drainage,
- Good aeration,
- Adequate soil pH (slightly acidic), and
- Low in nutrients.
There are many types of gardening soil but not all of them meet these requirements. Particular types of soil best suited as bonsai soil are Akadama, Kanuma soil, lava rock, river sand, pumice, perlite, vermiculite and organic compost.
Among these, Akadama can be quite expensive if you want to buy one outside of Japan. If you are looking for a replacement, vermiculate, lava rocks (volcanic soil) and pumice are good alternatives for Akadama, although not perfect substitutes.
If you want to explore more about bonsai soil, the following posts might be helpful.
How to make bonsai soil mix
When making a potting mix for your bonsai tree, it is important to consider the species of the tree. Some bonsai trees, such as pine or juniper, prefer a more inorganic soil mix, while others prefer a more organic mix.
Here is the basic soil mix ratio for bonsai trees by species. Flower and fruit bonsai trees need more nutrients to bloom and bear fruits.
Basic soil mix by species
| Coniferous | Deciduous | Flower/fruit | |
| Akadama/ Lava rock |
60% | 70% | 60% |
| River sand | 40% | 20% | 20% |
| Organic compost |
– | 10% | 20% |
Of course, you can always purchase pre-made bonsai soil mixes, which can simplify the process of buying each soil and mixing them. These mixes are (supposedly) designed for bonsai trees and contain all the necessary components in the right proportions. Make sure to check what is contained in the mix and in what proportion before you buy.
For a step-by-step guide on how to make a bonsai soil mix at home, please read the following post.
Can I use normal soil for bonsai?
Normal soil is not recommended for bonsai trees. Bonsai trees require a specific type of soil that is designed to provide good aeration, water retention and drainage.
Normal soil is often too dense and compact, which can prevent water and air from reaching the roots of the bonsai tree. It tends to be too rich in nutrients for bonsai trees as well, which can deform the shape and style of your trees with overgrowth.
While it may be tempting to use normal soil for your bonsai tree, it is important that you choose the right type of soil for its overall health and growth.
Bonsai pot: How to choose the right pot
Porcelain bonsai pot
Choosing the right pot for your bonsai trees is important as it can affect the trees’ health and growth. Four important aspects when choosing a new pot for your bonsai tree: (1) size, (2) material, (3) drainage, and (4) aesthetics.
Specifically, a bonsai pot needs;
- depth much shallower and size much smaller than usual pots;
- material that enables aeration and water retention;
- drainage holes of appropriate size and number at the bottom;
- to represent the landscape where the trees are growing in their natural state.
A container for your bonsai tree does not need to be specially made for bonsai but it does need to meet these requirements.
If you want to dig deeper into this topic, the following post might be helpful.
Do Bonsai trees need bigger pots?
While it may seem counterintuitive, bonsai trees do not need or should not be in larger pots as they grow. In fact, bonsai trees should be kept in small pots to help control their growth and maintain their size.
When a bonsai tree grows in a small pot, its roots are forced to grow in a confined space, resulting in the aerial portion of the tree such as leaves and branches growing small. This is one of the reasons why bonsai trees can stay miniature size.
If your bonsai tree is placed in a larger pot, it will grow into a full-sized tree, deforming its shape and style as a bonsai tree.
Root pruning: Why prune the roots when repotting
Is it necessary to trim the roots when repotting a Bonsai?
It is necessary to trim the roots when repotting a bonsai tree.
Over time, the roots of your bonsai trees grow longer and tangled, which can lead to a lack of oxygen and water reaching the roots. By trimming the roots, you can help to alleviate this problem and promote the development of new and healthy fine roots that can fit in a small pot.
Repotting bonsai: Step-by-step guide for beginners
What you need for repotting
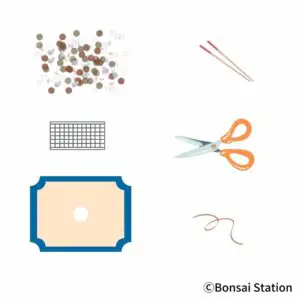
what you need to repot
To repot a bonsai tree you need;
- new bonsai soil mix
- a pot bottom net
- a (new) pot
- wooden chopsticks
- sharp scissors/shears
- string/wire
A step-by-step to repot a bonsai tree
Repotting a bonsai tree may seem daunting, but with the right tools and technique, it is a straightforward process. Here’s a step-by-step guide to repotting your bonsai tree.
Step 1: Remove the tree from the old pot
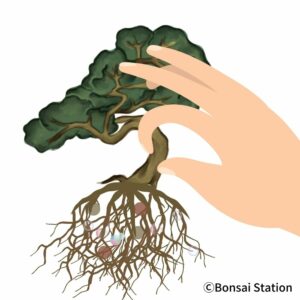
Remove the tree from the old pot.
Gently loosen the soil around the tree with a chopstick or similar tool. Tilt the pot and remove the tree.
If the roots are pot-bound and the tree is attached to the pot, tap the rim of the pot several times and see if you can remove the tree from the pot.
If the tree is still attached to the pot, use a small wooden spatula or a knife to gently make vertical cuts alongside the pot. Grab the bottom of the trunk and tease it very gently until you can remove the tree from the pot.
Step 2: Remove old soil from the tree’s roots
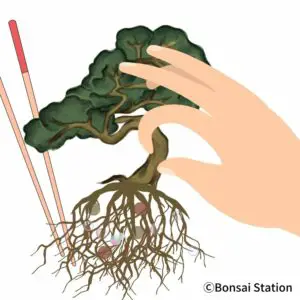
Remove the soil with chopsticks.
Using a wooden chopstick, remove 1/3 of the old soil from the tree’s roots so that you can observe the root system clearly. If the roots are bound and tangled together, try to untangle them as if you brush tangled hair to detangle it.
Examine the roots for any signs of damage, disease, or rot. If you smell the root ball and it smells bad, the roots may have some kind of problem.
Also, check whether multiple, even-sized fine roots are growing or a few larger, longer roots. Bonsai trees need even-sized, well-ramified, fine roots to grow healthy in a tiny pot.
Step 3: Prune the roots
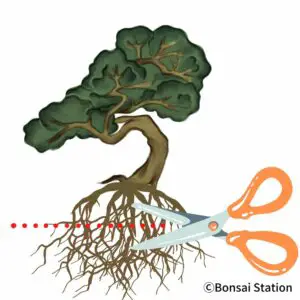
Prone the roots.
- roots that are especially thicker than other roots;
- overgrown roots that are longer than the depth of the pot; and,
- dead or rotten roots.
Trim the roots evenly around the tree to maintain balance.
Make sure not to overdo it especially when you are a beginner. Roots need a certain amount of their portion left to regrow. Also, use sharp shears as they make the wound on the roots heal smoothly.
Step 4: Test the position of the tree in the new pot
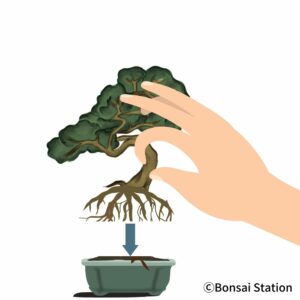
Decide the front of the tree and that of the pot. The front side of a bonsai tree is the side that looks most aesthetically pleasing from the viewing angle. Consider both visual appeal and visual interest when selecting the front of a bonsai tree.
Put the tree in the pot to test if its position is balanced.
For more detailed information on how to choose the front of your bonsai tree, the following post might be helpful.
Step 5: Place a pot bottom net in the pot

Place a pot bottom net.
Place a pot bottom net in the pot to cover the drainage hole(s). If the mesh of the net is too large for the new soil, you can use the fine-mesh screen used in the screen door.
Step 6: Put some of the bonsai soil mix

Put some of the soil mix.
Step 7: Reposition the tree and spread the roots evenly

Reposition the tree and spread the roots evenly.
Carefully place the tree in the pot. Keep in mind that the front of the tree and the pot are in the position decided in the previous step. Spread the roots evenly in every direction so that good surface roots (nebari) will be developed.
Step 8: Secure the tree using wires/strings
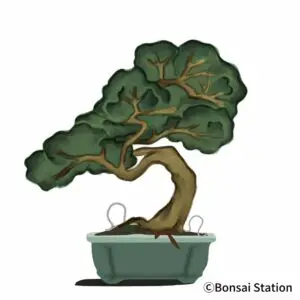
Secure the tree using wires/strings.
Secure the tree to the pot using wires/strings. The roots of the tree should be locked and immovable in the soil until the new roots are regenerated.
Step 9: Put the rest of the bonsai soil mix

Put the rest of the soil mix.
Hold the tree in place and put the rest of the bonsai soil mix in the pot. Use a wooden chopstick or a similar tool to gently push the soil into the air pockets. Add more soil and push the soil in between the roots.
Repeat the process until all the gaps are filled. Do not cover all the roots with soil but show the upper part of the root system so that you can see the surface roots and the base of the trunk clearly.
Species-specific tips for repotting bonsai trees
While the basic steps for repotting a bonsai tree are the same, different species may require special considerations. It is important to do your research and understand the specific needs of your bonsai tree species before repotting.
Here are some tips for repotting different types of bonsai trees:
Coniferous bonsai trees
Conifers, such as spruce and juniper, like nutrient-poor soil that is well-draining. Be careful not to prune roots heavily as they grow slowly.
Deciduous bonsai trees
Deciduous bonsai trees, such as maple, elm, and oak, need a basic nutrient (organic matter) in the soil. You can trim their roots rather hard as their roots can grow back rapidly.
Flowering/fruit trees
Flowering trees, such as cherry and plum blossom, can be repotted before or immediately after flowering in the spring. Use a soil mix that contains organic matter to support flowering and fruiting.
Repotting aftercare
After repotting your bonsai tree, it is important to provide it with proper care to ensure that it can recover and thrive in the new pot. Here are some tips for aftercare.
Watering
Water your bonsai tree immediately after repotting to moisten the roots and help settle the soil. Give abundant water so that the new soil is saturated with moisture.
Watering by the immersion method allows you to completely moisturize the dry soil. Submerge the pot in a container of water for a certain amount of time until the water permeates the soil completely.
Hold the pot in the air and check if the water is running out of the holes. If the water isn’t clear, continue giving water until it clears out. This will allow getting rid of tiny particles of soil which can become a cause of compacted soil.
Then, water it regularly according to the tree’s specific needs, making sure not to overwater or underwater it. Check the soil moisture level regularly and give water when the soil is half dry. Do not let the new soil dry out especially when the roots are not yet regrown.
For more detailed information on watering, please read the following post.
Light and wind
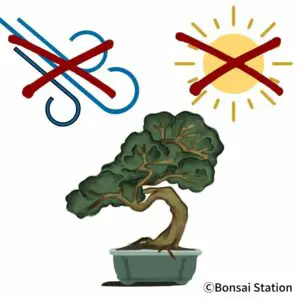
Avoid strong wind and direct sunlight.
Avoid strong wind as well as direct sunlight for a week after repotting. Place your bonsai tree in a location where it can receive the appropriate amount but not too strong sunlight.
Fertilizer
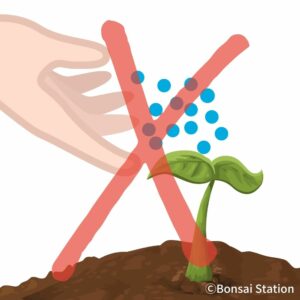
Wait at least 2 to 4 weeks after repotting to fertilize your bonsai trees until they take root. Without a developed root system, bonsai trees cannot take in the nutrients you give.
When you do fertilize, start with a very diluted fertilizer to avoid root burn.
Pruning
After repotting, avoid pruning the tree for at least a month to allow it to recover. Once the tree has recovered, you can resume pruning as needed to maintain its shape and health.

